MASTER CRUSH – One Room Challenge Fall 2020
Let’s talk about the power of a One Room Challenge! I decided to participate in this lovely event for two reasons: First I wanted to showcase a piece that was reflective of my style and offer tips to others on how to make an easy transformation of their own. But, then the selfish part of me, who has been living in what I call the Graveyard Bedroom for so many years, was looking to finally feel relaxed and calm in the most important room of the home.
Let’s talk about the old situation: It was a graveyard of old furniture thrown in plus overrun with our kids overflow of toys. The old ceiling fan broke and I never got around to replacing it in 2 years. The room is so big that the kids toys spilled into it essentially creating a mini playroom, which in hindsight sounds wild.
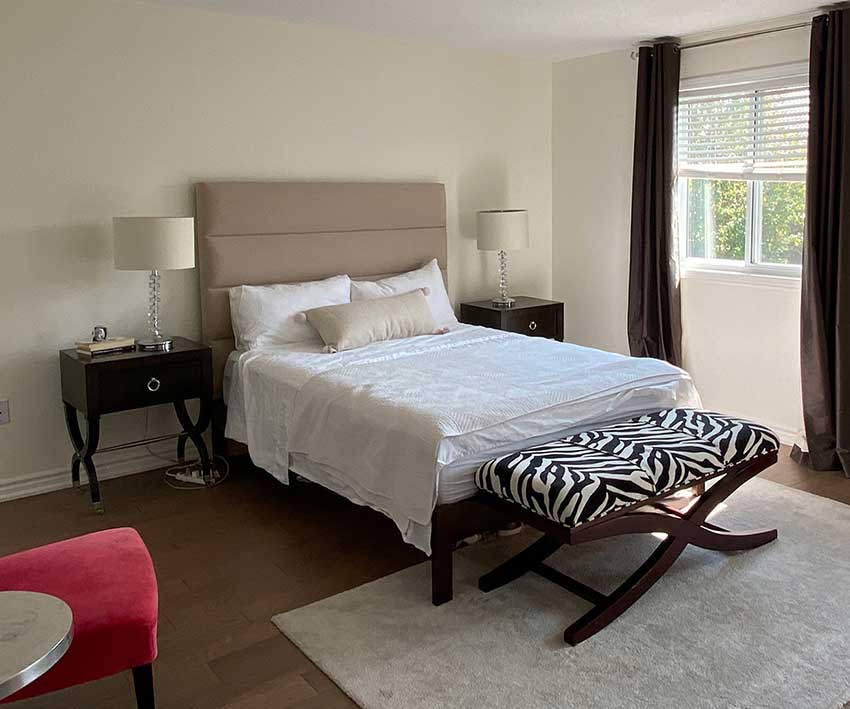
My story is the same as every “before” story from my clients… “I just got used to it”… “it was hard to get started”. I have heard so many people say that to me and what I always say to them is, “you need someone to just get it all done in 1 shot”. Well that’s what I needed… mine came in the form of a community design challenge with a finish line, and 6 weeks of accountability to show the progress with a final reveal.
STARTING POINT: DESIGN CONCEPT
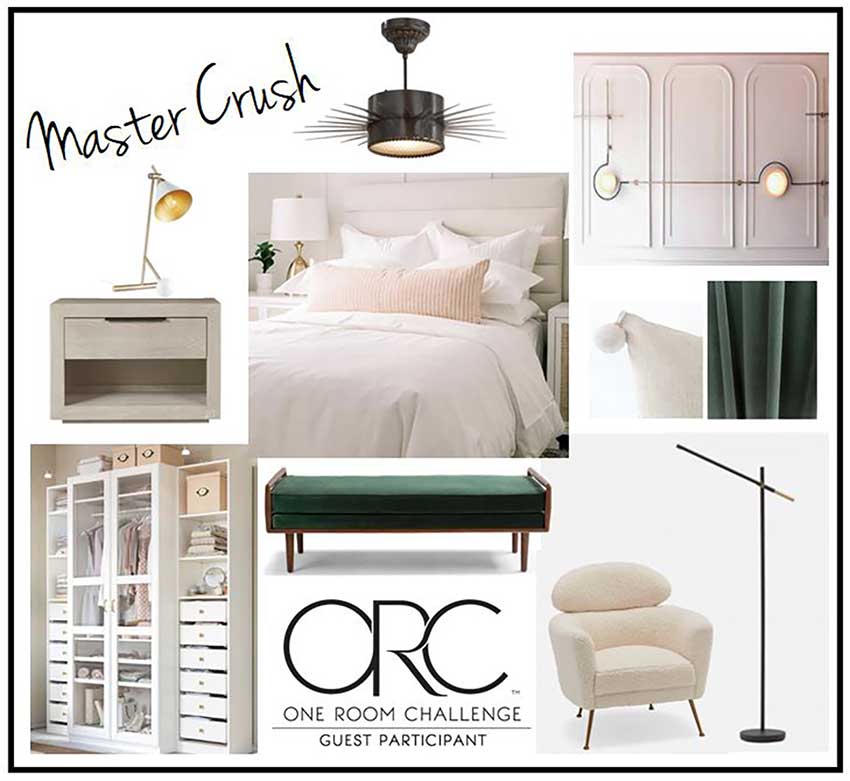
My design concept started like any other project with a vision board. I knew I was sticking to décor (no construction), I was keeping the bed and dresser and I wanted a calm aesthetic with small pops of unexpected. So I went shopping online!
FLOOR PLAN and ZONES:
This room is huge and I knew there wouldn’t be a TV or sofa in there. Plus the kids often use the space for a change of scenery to plan. So here are some features to the layout for a wise use of a large space:
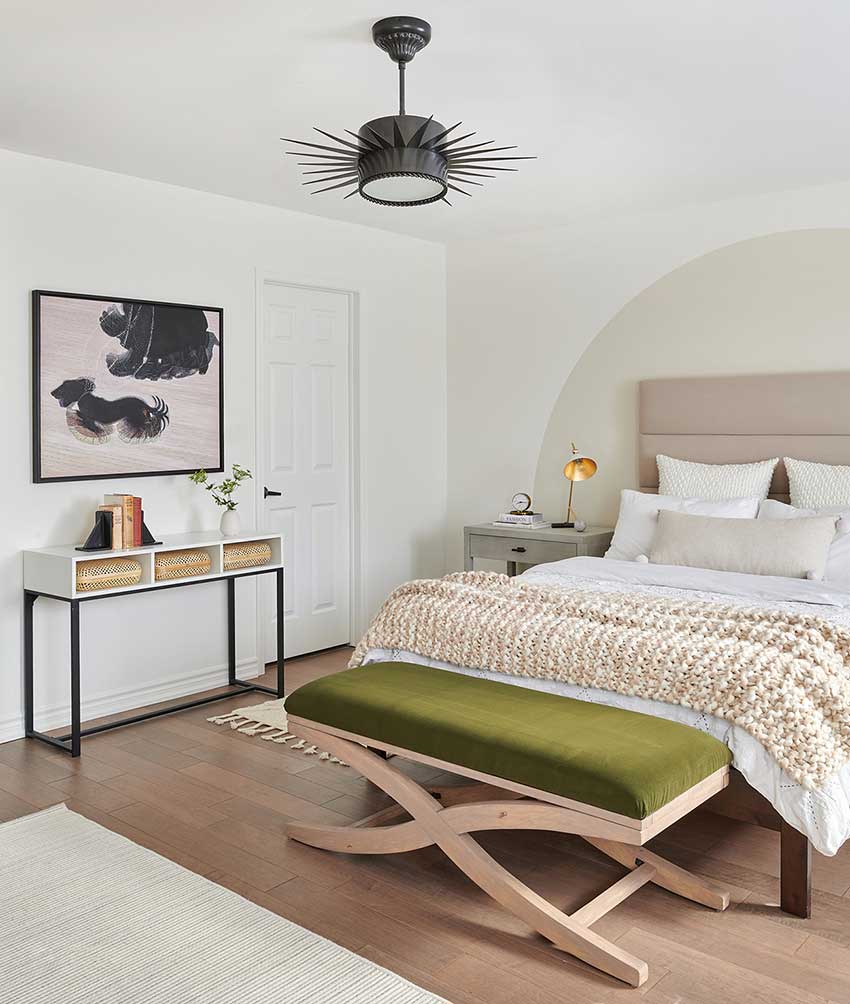
Zone #1. Bed/nightstands on the wall facing the door for a nice welcoming view
Zone #2. Console area near the washroom for a drop off zone of things before you hit the shower.
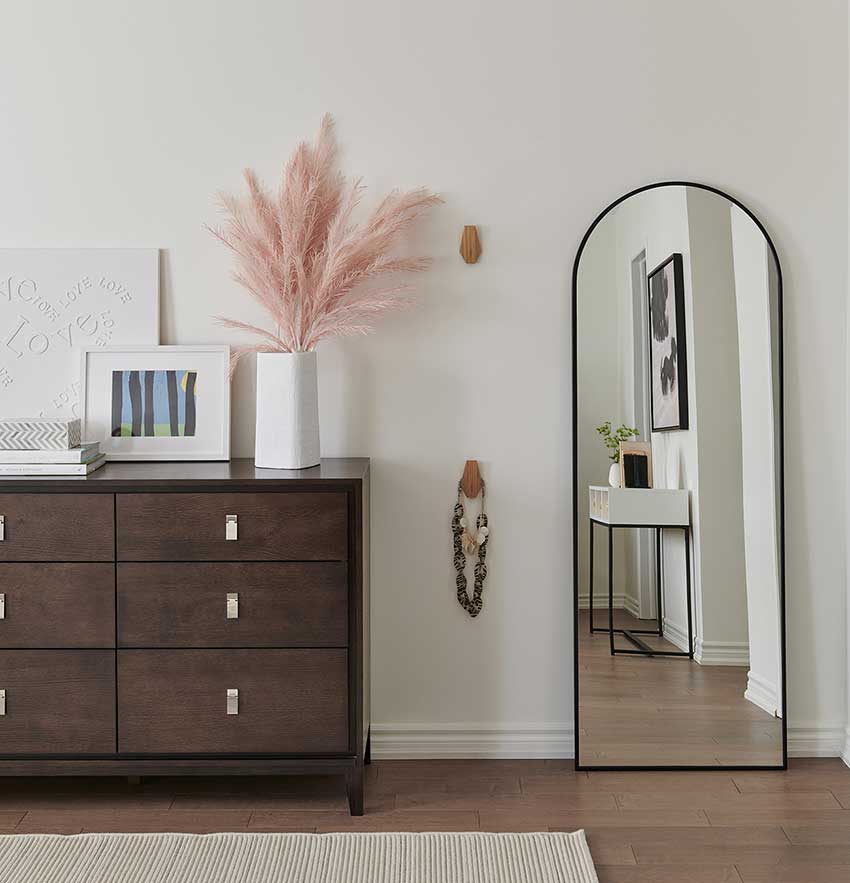
Zone #3. Dressing area near the closet includes the dresser, a mirror and some hooks for planning the next day’s wardrobe.
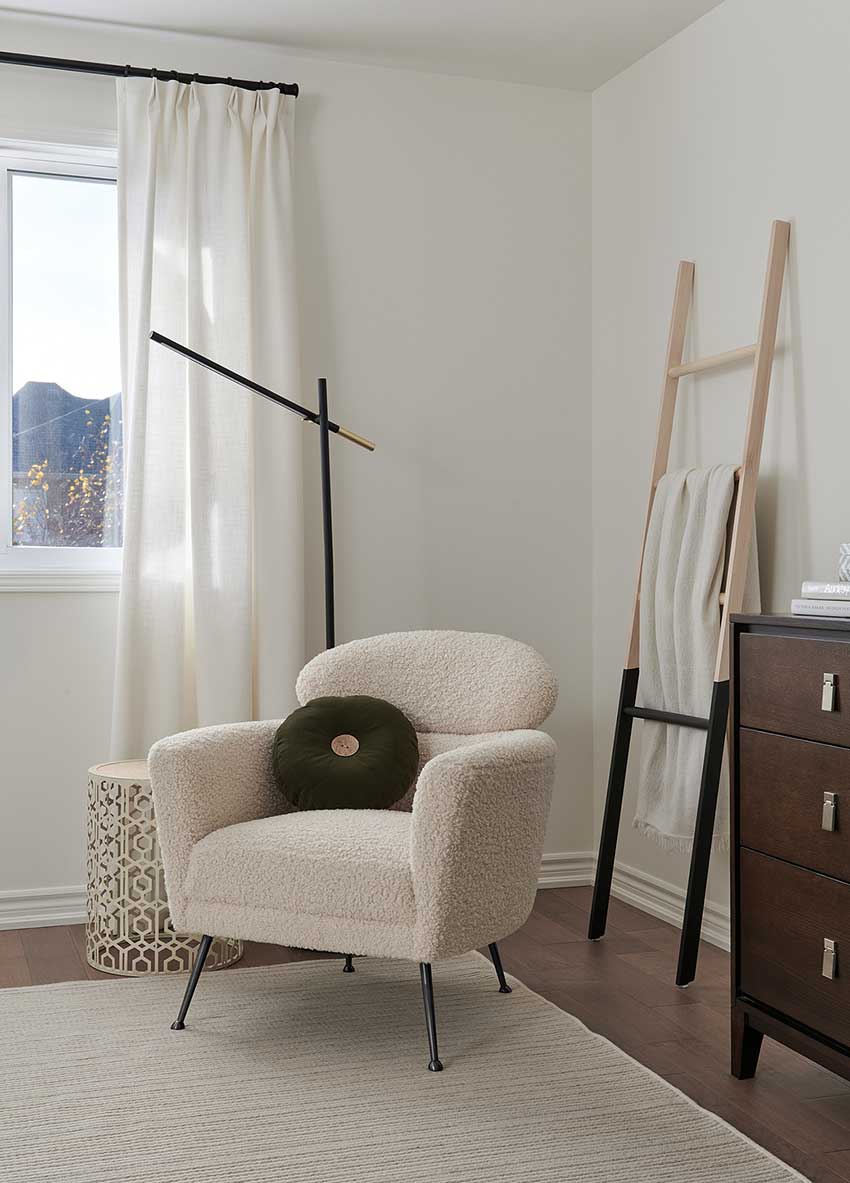
Zone #4. Lounge corner with a cozy chair, side table, blanket ladder and open carpet area in case we have story time and spill onto the floor.
MAKEOVER DIYs:
The headboard wall was a big one for me – I wanted something interesting but wanted to avoid squared corners of art on the walls. Hence the tone on tone semi circle painted wall. Do I need to make a DIY blog on this one?
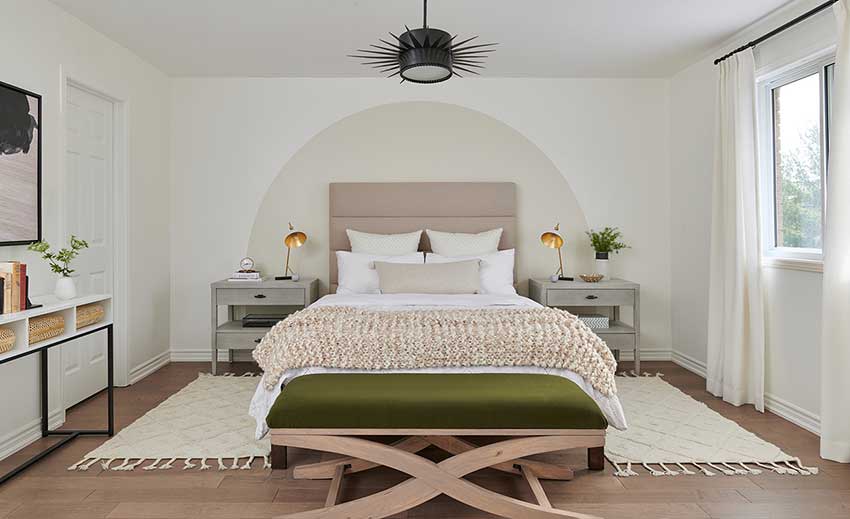
From there the other DIY features were painting the unit under the art white (it came in grey), painting the legs of the cozy chair black and refurbishing the bench! The bench legs were sanded and stained a new colour and the top received a mossy green textured fabric thanks to my trusted workroom, Moonstone Interiors.
THE FURNITURE AND FINISHINGS:
I chose to put 2 runners along side the bed, leaving the large rug for the open area to avoid 2 large rugs in one space and also, it makes cleaning under the bed a snap. The rest was a combination of textures and neutral soft colours creating a very peaceful and neutral feeling. The gentle interruptions like the ceiling light and dramatic art give a bit of tension to keep it from being too boring. Clever storage like the ottoman, basket and several decorative boxes help keep any lingering toys in check.
And that’s it. The master bedroom is definitely now a master crush – we all love it (and yes, some toys have already snuck in).
XO Diane
Photography: Stephani Buchman Photograpy
Suppliers: Lights – Lumina Sales Inc, Ladder – Trouville Décor, rugs – Wayfair, Nightands – Accents For Living/ Universal Furniture